
Siem Reap on a Shoestring: A Photographer's Para...
Siem Reap. Just the name conjures images of ancient temples, vibrant culture, and breathtaking landscapes. As a photographer always on the hunt for the next great shot, I knew I had to experience it for myself. The only catch? I was on a budget. Could I truly capture the essence of this Cambodian gem without breaking the bank? Absolutely! This blog post details my 3-day Siem Reap photography itinerary, proving that stunning imagery and affordable travel go hand-in-hand.
After returning home with a memory card full of incredible shots and a renewed appreciation for budget travel, I'm excited to share my experience with you. Get ready to pack your camera bag, tighten your bootstraps, and prepare to be amazed.
Day 0: Settling In and Sunset Views
My adventure began at The Mad Monkey hostel. Not only was it incredibly budget-friendly, offering dorm beds at a price that left me pleasantly surprised, but it was also a photographer's dream.
The dorm arrangement was comfortable and safe, with individual lockers to secure my gear. But the real highlight? The rooftop bar. The sunset views from up there were simply spectacular. Before heading out for a night of budget-friendly street food, I made sure to capture fellow travelers preparing for their early morning Angkor Wat adventures. I used a wide-angle lens (something around 16-35mm), set my aperture to f/2.8 for that shallow depth of field, and bumped up the ISO to 400 to compensate for the dimming light. Waiting for those candid moments – a shared laugh, a thoughtful gaze – made all the difference. Pro Tip: The Mad Monkey is also a great place to connect with other like-minded budget travelers; I found a few folks who were keen to join me on photo walks later in the trip!
Day 1: Angkor Wat Sunrise and Expert Guidance
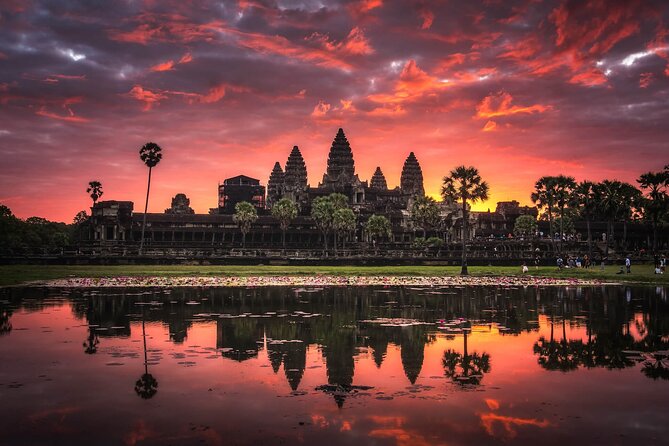
The star of the show, of course, is Angkor Wat. But instead of just wandering around with the masses, I opted for a sunrise photography workshop with a local photographer named Sophea. This was, without a doubt, the best investment I made. Sophea can be contacted at: [email protected]
Sophea was invaluable. He not only knew the best spots for capturing the sunrise, but he also shared invaluable tips on camera settings, composition, and ethical considerations.
Here's a glimpse of what I learned:
- Camera Settings for Sunrise: Sophea recommended using aperture priority mode (Av or A on your camera dial). He suggested setting the aperture between f/8 and f/11 for good depth of field. Bracketing for HDR (High Dynamic Range) was also key to capturing the full range of light, from the dark shadows to the bright sky.
- Composition Techniques: Sophea emphasized the rule of thirds, guiding me to position Angkor Wat off-center for a more dynamic composition. He also pointed out the leading lines of the causeway, which drew the eye towards the temple. The causeway is perfect for setting up your shot.
- Reflection Magic: The reflection of Angkor Wat in the moat is iconic. Sophea showed me how to find the best angle and wait for the perfect moment when the water was still and the reflection was crystal clear.
- Ethical Considerations: Photographing monks and cultural sites requires respect. Always ask for permission before taking someone's picture, and be mindful of their space. Dress respectfully (shoulders and knees covered) when visiting temples.

Sophea also has prints for sale which are very affordable. Purchasing a print from Sophea is a wonderful way to support local artists and take home a unique souvenir.
Day 2: Street Art, Flavors, and Blessings
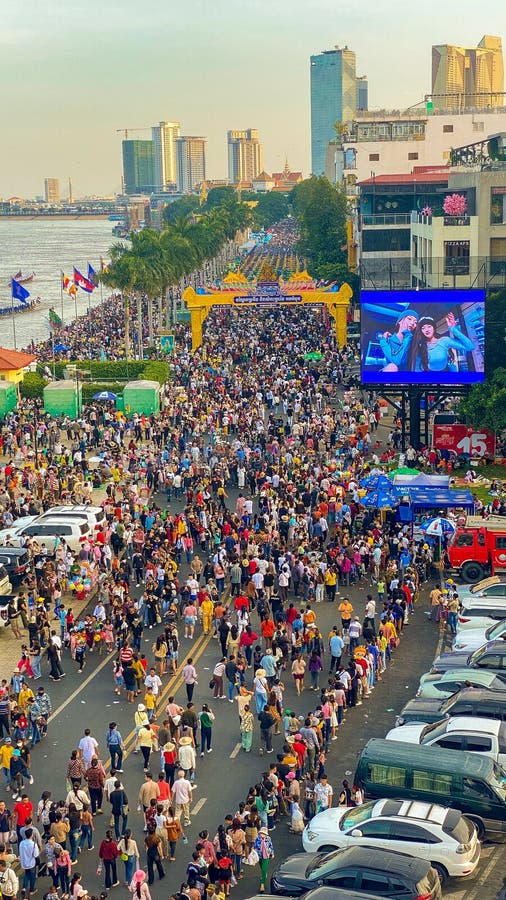
Day two was all about exploring Siem Reap beyond the temples. I started with the street art scene around Pub Street. While the area is known for its nightlife, the daytime reveals a vibrant collection of murals and graffiti.
Capturing candid portraits was the name of the game here. My tips:
- Focus on the Eyes: The eyes are the window to the soul. Nail the focus on the eyes, and you'll capture a compelling portrait.
- Fast Shutter Speed: Use a fast shutter speed (1/250th of a second or faster) to freeze the action and avoid blurry photos.
- Shoot from the Hip: Sometimes, the best way to capture a candid moment is to shoot from the hip, without raising the camera to your eye. This can help you remain discreet and capture more natural expressions.
For lunch, I highly recommend Genevieve's Restaurant. Their Amok curry was divine, and they're committed to using locally sourced ingredients and donating to local charities.
Genevieve's is also a photographer's delight. The lighting is warm and inviting, the colors are vibrant, and the textures are rich. I tried to capture the ambiance by focusing on the details: the hand-painted signs, the colorful tablecloths, and the smiling faces of the staff.
In the afternoon, I visited Wat Bo temple. I had previously arranged (through a local contact) for an interview with one of the monks about their daily life. It was a truly enlightening experience, and I felt privileged to learn about their traditions and beliefs. After the interview, the monk gave me a blessing. I asked if I could capture the moment, and he graciously agreed.
Day 3: Floating Village Adventure by E-Bike
For my final day, I ventured out to Kampong Phluk, the floating village. To get there, I rented a NIU electric scooter from Siem Reap E-Bike Rentals (located near the Old Market). The rental cost was approximately $15 for the day.
The NIU e-bike was fantastic. It had GPS tracking and a 60km battery range, which was more than enough to get me to Kampong Phluk and back.
Important safety tips:
- Mandatory Helmet: Always wear a helmet.
- Avoid Driving After Dark: The roads can be dangerous at night.
- Be Aware of Tourist Scams: Be wary of anyone offering unsolicited help or advice.
Kampong Phluk was a photographer's dream. The stilted houses reflected beautifully in the water (golden hour is the best time to capture these reflections; a polarizing filter will help reduce glare). I focused on capturing the daily life of the villagers, from children playing to fishermen casting their nets. I used a telephoto lens to avoid disturbing them. Remember, responsible tourism is key. Focus on storytelling through your images.
Understanding Angkor: A Little History Goes a Long Way
Before my trip, I made sure to do some research on the history of the Angkor region, particularly the reign of King Jayavarman VII. I highly recommend reading "Angkor: Heart of an Asian Empire" by Bruno Dagens. Understanding the history behind the architecture gave my photography so much more depth and meaning.
Processing Your Photos: The Final Touch
Back home, I used Adobe Lightroom to process my Siem Reap photos. The tropical light can be tricky, so I focused on adjusting the white balance to correct any color casts. I also used the dehaze slider to reduce atmospheric haze and bring out the details in my landscapes. Finally, always back up your photos and create a photo essay to remember your incredible trip.
Siem Reap truly is a photographer's paradise, even on a shoestring budget. With a little planning, some savvy choices, and a passion for capturing the moment, you can create a stunning portfolio of images that will last a lifetime. Now, go explore!