
Glamping Fail to Rustic Win: Upper Pines Campgro...
Yosemite National Park. The name alone conjures images of majestic granite cliffs, cascading waterfalls, and towering sequoias. As self-proclaimed "glampers," Maya and I (Ben) were ready to trade in our usual plush hotel stays for a rustic tent camping adventure in Yosemite's Upper Pines Campground, specifically campsite #132. Armed with a borrowed vintage-style canvas bell tent, a Jackery power station, and dreams of Instagram-worthy campfire scenes, we dove headfirst into the wilderness. But let’s just say the reality was a little less glam and a whole lot more camp. This Upper Pines Campground review spills all the details, from navigating Yosemite crowds to squirrel encounters, and whether we’d actually do it again. We are ready to spill the tea on the glamping fail and rustic wins, along with tips for how to have an aesthetic camping experience in Yosemite!
Yosemite Traffic & The YARTS Bus: Getting to Upper Pines
July in Yosemite Valley is beautiful, but the traffic? Not so much. Parking is a nightmare, so we wisely opted for the Yosemite Area Regional Transportation System (YARTS) bus from El Portal. While it saved us the stress of circling for parking, the bus schedule felt a little slow. It took about an hour and a half to reach the Upper Pines Campground from the Yosemite Valley Visitor Center, including waiting for the connections. Pro-tip: Factor in extra travel time, especially during peak season!
Setting Up Camp at Upper Pines Campsite #132: The Bell Tent Struggle
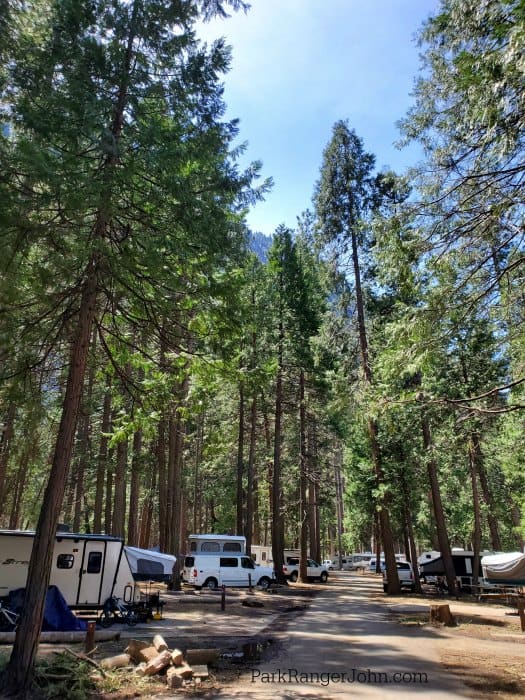
Our borrowed vintage-style canvas bell tent was, let's just say, a beast. It looked amazing, but hauling its weight and figuring out the setup was a comedy of errors. The center pole proved especially challenging, requiring both of us to hoist it while simultaneously staking down the edges. We were so grateful for all our upper body workouts leading up to the trip. Campsite #132 at Upper Pines Campground is fairly large, offering ample space for the tent, our NEMO Stargaze Recliner Luxury chairs, and our cooking area. We were located conveniently close to the bathrooms and bear boxes – a blessing and a curse, as you’ll read later. The campsite offered a mix of sun and shade, which was great for temperature control. The ground was uneven in some spots, though, which made finding the perfect tent placement tricky.
Campground Rules Realities: Bear Canisters & Fire Restrictions
Yosemite takes its food storage regulations seriously, and rightfully so. Bear canisters were required at all times, even when we were at the campsite. This meant meticulously packing away everything edible, from snacks to toothpaste, in the bear canister. It definitely impacted our meal planning. We had to be super strategic about what we brought and how we stored it. During the summer months, fire restrictions are common. We were only allowed to use the designated fire ring for cooking, and gathering firewood was prohibited. "Leave No Trace" principles were strictly enforced, which we fully supported. We made sure to pack out all our trash, including even the tiniest scraps, and minimized our campfire impact by using only the existing fire ring.
Upper Pines Campground Bathrooms & Showers: A Reality Check
The Upper Pines Campground bathrooms were…well, they were bathrooms. Extremely busy in early July, but surprisingly relatively clean given the volume of users. However, amenities were scarce. Soap dispensers were consistently empty, and the paper towel situation was dire. Forget about trying to look presentable; we were just happy to have a toilet. If you are camping for a while, you need to have an efficient camp shower set up. Showers are available at Curry Village, but it's $5 per person for an 8-minute shower, and the wait time can be significant. We only braved the shower line once during our stay.
Activities Gone (Slightly) Wrong: Hiking, Photoshoots & Stargazing
Hiking (or Not) the Mist Trail
Our ambitious plan to hike the Mist Trail to Vernal Fall quickly fizzled. We underestimated the difficulty of the trail, especially with our heavier gear. I had a massive camera bag slung across my shoulder, and Maya opted for trendy, but utterly impractical, hiking boots. We only made it to the footbridge before turning back, defeated by the crowds and the heat. Lesson learned: invest in proper hiking shoes and pack light!
Tunnel View Photoshoot: Chasing the Golden Hour
We couldn’t leave Yosemite without the iconic Tunnel View shot. Sunset is the time to be there, but be prepared for crowds. Finding a good vantage point was a battle, but we finally managed to snag a spot. I used a wide-angle lens (16-35mm), set my ISO to 100, aperture to f/8, and adjusted the shutter speed to capture the perfect exposure. The view was breathtaking! We even attempted a Boomerang video to capture our Yosemite excitement, which… well, it's on my instagram, but not my finest work. The number of people photobombing was comical.
Stargazing Fail/Win: Red Light Redemption
Yosemite's dark skies are incredible, but light pollution from Curry Village does impact visibility. We used the SkyView Lite app to identify constellations, which was super cool. We brought a red light headlamp to minimize light pollution, but halfway through our stargazing session, it died. Luckily, Maya had a backup flashlight on her phone, which got us back to camp safe.
Campfire Gourmet: Foil Packet Meals
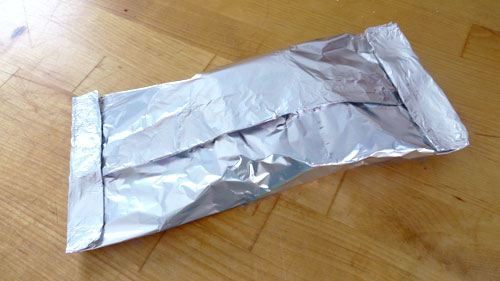
We wanted gourmet campfire meals, and these foil packets delivered!
Recipe: Gourmet Foil Packet Meals
Ingredients: Pre-cooked quinoa, pre-cooked Italian sausage (removed from casing and crumbled), red bell peppers (sliced), red onion (sliced), cherry tomatoes, zucchini (sliced), feta cheese, olive oil, balsamic glaze, Italian seasoning, salt, pepper.
Instructions: Layer ingredients in heavy-duty foil packets, drizzle with olive oil and balsamic glaze, season with Italian seasoning, salt, and pepper. Cook over campfire coals (or on a portable camping stove) for 15-20 minutes, or until vegetables are tender. Top with feta cheese before serving.
These foil packets were delicious and surprisingly easy to make! The combination of savory sausage, sweet balsamic glaze, and salty feta was a flavor explosion. Plus, cleanup was a breeze.
Packing List Wins & Fails: Power & Pine Needles
Our Jackery Explorer 500 portable power station was a lifesaver! It kept our phones, cameras, and portable speakers charged throughout the trip. We used it to charge two iPhones, a Sony A7iii camera, and a small bluetooth speaker and still had plenty of power left after three days. A major fail, however, was forgetting a small broom. Our tent was quickly overrun with dirt and pine needles. So, so dirty! Our NEMO Stargaze Recliner Luxury camp chairs were a definite win! They were incredibly comfortable for lounging around the campsite and stargazing.
Squirrel Shenanigans: A Constant Battle
The squirrels at Upper Pines Campground are relentless. They were constantly trying to get into our food, even when it was supposedly "hidden." We had to be extra vigilant about keeping everything properly stored in the bear canisters and even draped a tarp over the picnic table when we left the campsite to deter them. It was a constant battle, but we eventually managed to outsmart them. These furry fiends were fearless!
Tech Review: Gaia GPS
Gaia GPS was essential for navigating Yosemite's trails. We pre-downloaded maps and created a custom route to the Mist Trail. Even with limited cell service, the app worked flawlessly. Its offline navigation capabilities gave us peace of mind, knowing we wouldn't get lost.
Cost Breakdown: Camping vs. Glamping
Camping at Upper Pines is significantly cheaper than staying in a hotel or vacation rental in Yosemite Valley. Campsite reservation fees were $36 per night, and the park entrance fee was $35. The bell tent was borrowed, but a similar rental would cost around $100-$150 for the weekend. Compare that to The Ahwahnee Hotel (easily $600+ per night) or even Yosemite View Lodge in El Portal ($300+ per night), Best Western Yosemite Way Station in Mariposa ($200+ per night) or Yosemite Pines RV Resort in Groveland ($150+ per night). The trade-offs are comfort and convenience, but the cost savings are substantial.
The Rustic Reality: Embracing the Imperfect
Our initial vision of "glamping" – plush pillows, fairy lights, gourmet meals on china – quickly collided with the reality of rustic camping. We had dirt, sweat, squirrels, and limited amenities. Setting up camp was challenging, cooking over a campfire was messy, and navigating the park was exhausting. But despite the challenges, we made incredible memories. There was a definite sense of accomplishment after overcoming the hurdles. Were we ready to do it again? Absolutely! Maybe with slightly better hiking boots.
Instagram Angle: Capturing the Rustic Charm
We documented our entire adventure on Instagram. Our posts included a photo of our tent at sunset, a time-lapse of us cooking the foil packets, and a selfie at Tunnel View. We used hashtags like #yosemite, #upperpinescampground, #glampingfail, #tentcamping, #travelgirls, and #californiaadventure. Balancing capturing aesthetic photos with actually enjoying the experience was tough, but we tried to find a happy medium. The most popular photo was a snapshot of us laughing after a squirrel almost stole our bag of marshmallows. People loved the authenticity!
Call to Action
Ready to ditch the glamping and embrace the rustic charm of Yosemite (or at least try it once)? Check out vistalocation.com for tips on booking your campsite and preparing for your adventure!